 PopHorror Let's Get Scared
Ping-pong Ghost Lights
What I used: 12 ping-pong balls, cheese cloth, Mod Podge, water, plastic bottles, wax paper, black paint, string of white lights.
Puncture small holes on the top of your ping-pong balls. Try to push one of the tiny light bulbs into each hole to get the best fit. Paint an assortment of faces on each ping-pong ball, but make sure the hole for the light is at the top of the ball. You could use permanent marker but for me, black paint had a clean, crisp look. Meanwhile, dilute the Mod Podge with some water and set this mixture to the side.
Pull out a large piece of wax paper to set up your workspace. I took 6 emptied water bottles and cut right above the label. I used the half with the mouthpiece to serve as a base for my ghosts to sit on and dry. Space out the bottle bases with the cut side down and place your ping-pong balls on top. Cut out twelve 8″x 8″ squares of cheese cloth. Again, there is no need to be perfect here.
Completely submerge one of the cheesecloth squares into the Mod Podge mixture. You might want to wear gloves for this part as it can be messy. Ring out any excess mixture and drape the opened square over the top of one of the ping-pong balls. Be sure to add some extra mixture to the top of the ball for a stronger bond. Bundle, pinch, or spread out the bottom of your cloth square to be sure it displays motion and movement.
The ghost will hold this shape once it’s completely dry. Continue with the remaining ping-pong balls. Allow 12-24 hours to dry. The ghosts will easily lift from the wax paper. Cut through to expose the hole for the lights. Give at least 2 lights in between the ghosts to make sure each one has its own space to hang. Lastly, you’ll want to set up a base for your ghost lights to hang from.
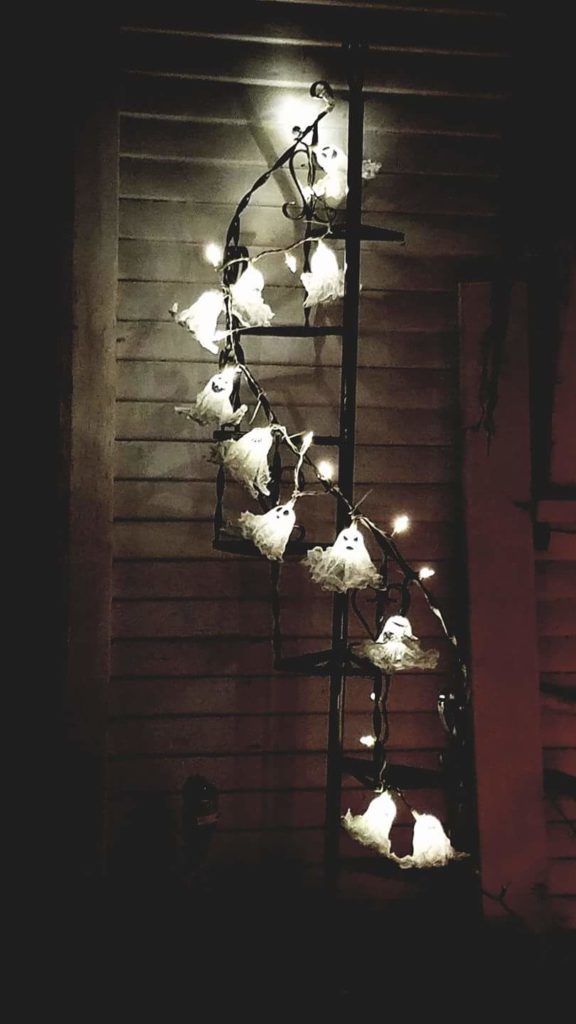
We had this really awesome spiral plant display. I zip tied the lights to the display and plan on adding pumpkins to the stands. The original tutorial used a fake dead tree, but these guys look great just about anywhere. Just a quick tip: if you can’t find a small number of lights, don’t fret. I purchased a string of 50 lights, and starting at one end, I removed the little bulbs until one section of the lights went out. That way I only had half of the full string to deal with. Play around it; you might stumble on some great ideas.
Well, there you have it… PopHorror’s contribution to your DIY Halloween holiday. We hope you found some fun crafts to create this season. For the most part, these ideas are kid friendly, making them so much more fun to create. We hope you enjoyed this article and, if you have some of your own DIY or repurposed crafts, share them in the comments! Thanks for reading and happy decorating!


These are so awesome . …I love DIY stuff and usually try to add at least 1 prop to ourvyard….last year I made my crooked fence fof graveyard and Made my husband make me body frames that we dressed with clothes from thrift store for zombies….always love to see what others fo or get some great ideas.
Thank you for this spooktackler article!!!!!
Thank you for sharing! We appreciate the feedback!
Thank you Donna! I’m glad you enjoyed the article. Sounds like you’re full of ideas as well. I enjoy all the decorations in the stores but its special when I see people get so creative and make things.
Deeply appreciate the feesback.